Define principal namespaces
As discussed in Basic concepts, Kadena namespaces provide a static prefix and a secure boundary for all of the contracts, modules, functions, and keyset definitions that you control. When you are building, testing, and deploying smart contracts on your local development network, you can work directly in the root namespace without defining this boundary. For local development, your work is isolated from others because your blockchain—and any smart contracts you deploy—run exclusively on your local computer.
However, if you want to deploy a smart contract on a public blockchain network, like the Kadena test network or main production network, the contract must have a unique name that distinguishes your Pact module from all the others. If you try to deploy a Pact module with a name that's already being used on the network where you are trying to deploy, the deployment will fail with an error and you'll pay a transaction fee for the failed attempt.
To prevent name collisions on the same network, Kadena allows you to define your own unique namespace on the blockchain. The namespace segregates your work—your smart contracts, keyset definitions, and Pact modules—from applications and modules created and deployed by others. Within your namespace, you can control who has access to which features and who can update the namespace with changes. As long as the namespace has a unique name, everything you define inside of that namespace is automatically unique, too.
To ensure every namespace has a unique name, Kadena provides a built-in ns module on the main, test, and development networks.
You can use the ns module to create a uniquely-named and cryptographically-secure principal namespace on any Kadena network.
The ns module includes a create-principal-namespace function specifically for this purpose.
The create-principal-namespace function enables you to create a namespace using the prefix n_ followed by the hash of a keyset.
This naming convention ensures that your principal namespace won't conflict with any other namespaces defined in the same network.
The following example demonstrates how to define a principal namespace in your development environment by using the Kadena CLI and a transaction template.
Create a transaction request
To define a principal namespace:
-
Open the code editor on your computer and create a new transaction template (
.ktpl) file in the~/.kadena/transaction-templatesfolder.For example, create a
namespace.ktplfile in the~/.kadena/transaction-templatesfolder. -
Create a transaction request that executes the
define-namespacefunction using the output of thecreate-principal-namespacefunction from the namespace (ns) module in the YAML API request format.The
define-namespacefunction takes three arguments:Argument Type Description namespacestring Specifies the name used to register your namespace. user-guardguard Specifies who can use the namespace. admin-guardguard Specifies the owner and administrator who controls the namespace. In the following example, a single keyset—the
dev-accountkeyset—is used for all three arguments like this:- As input in the
(ns.create-principal-namespace (read-keyset "dev-account"))expression to generate the principal namespace hash to be registered for the namespace. - As input to define both the
user-guardand theadmin-guardarguments required to define the namespace on a specific network and chain.
In this example, the
dev-accountkeyset has one key and uses thekeys-allpredicate to define a principal namespace based on thefe4b6da332193cce4d3bd1ebdc716a0e4c3954f265c5fddd6574518827f608b7public key:code: |-
(define-namespace (ns.create-principal-namespace (read-keyset "dev-account")) (read-keyset "dev-account") (read-keyset "dev-account"))
data:
dev-account:
keys: [fe4b6da332193cce4d3bd1ebdc716a0e4c3954f265c5fddd6574518827f608b7]
pred: "keys-all"
meta:
chainId: "3"
sender: "k:fe4b6da332193cce4d3bd1ebdc716a0e4c3954f265c5fddd6574518827f608b7"
gasLimit: 80300
gasPrice: 0.000001
ttl: 600
signers:
- public: "fe4b6da332193cce4d3bd1ebdc716a0e4c3954f265c5fddd6574518827f608b7"
caps:
- name: "coin.GAS"
args: []
networkId: "development"If you want to define a principal namespace that requires any key from a mutli-signature account to sign transctions and uses separate keysets for the
user-guardandadmin-guardarguments, you can modify thedefine-namespacefunction and the keyset data accordingly. For example:code: |-
(define-namespace (ns.create-principal-namespace (read-keyset "ns-admin")) (read-keyset "ns-user") (read-keyset "ns-admin"))
data:
ns-admin:
keys: ["{{public-key-1}}","{{public-key-2}}","{{public-key-3}}"]
pred: "keys-any"
ns-user:
keys: ["{{public-key-1}}"]
pred: "keys-all"
meta:
chainId: "{{chain-id}}"
sender: "{{sender-account}}"
gasLimit: 80300
gasPrice: 0.000001
ttl: 600
signers:
- public: "{{public-key-1}}"
caps:
- name: "coin.GAS"
args: []
networkId: "{{network-id}}"If you create a reusable template with variables, you can provide values for the template variables interactively or in a data file. For example, you can add the values to a data file named
principal-namespace.yamlwith values similar to the following:public-key-1: "58705e8699678bd15bbda2cf40fa236694895db614aafc82cf1c06c014ca963c"
public-key-2: "1d5a5e10eb15355422ad66b6c12167bdbb23b1e1ef674ea032175d220b242ed4"
public-key-3: "4fe7981d36997c2a327d0d3ce961d3ae0b2d38185ac5e5cd98ad90140bc284d0"
chain-id: "4"
sender-account: "w:5HKwn7J9IqSwYU5ETqrDh7EgK43VQwMI0AQ11se7SLM:keys-any"
network-id: "development" - As input in the
-
Create a transaction that uses the template by running
kadena tx addand responding to the prompts interactively or using command-line options similar to the following:kadena tx add --template="namespace-multisig.ktpl" --template-data="principal-namespace.yaml" --out-file="multisig.json" -
Sign the transaction by running
kadena tx signand responding to the prompts interactively or using command-line options similar to the following:kadena tx sign --tx-sign-with="wallet" --tx-unsigned-transaction-files="multisig.json" --wallet-name="pistolas-wallet" -
Send the transaction to the blockchain by running
kadena tx sendand responding to the prompts interactively or using command-line options similar to the following:kadena tx send --tx-signed-transaction-files="transaction-39LtH3PjVf-signed.json" --tx-transaction-network="devnet" -
Verify the transaction results in the block explorer:
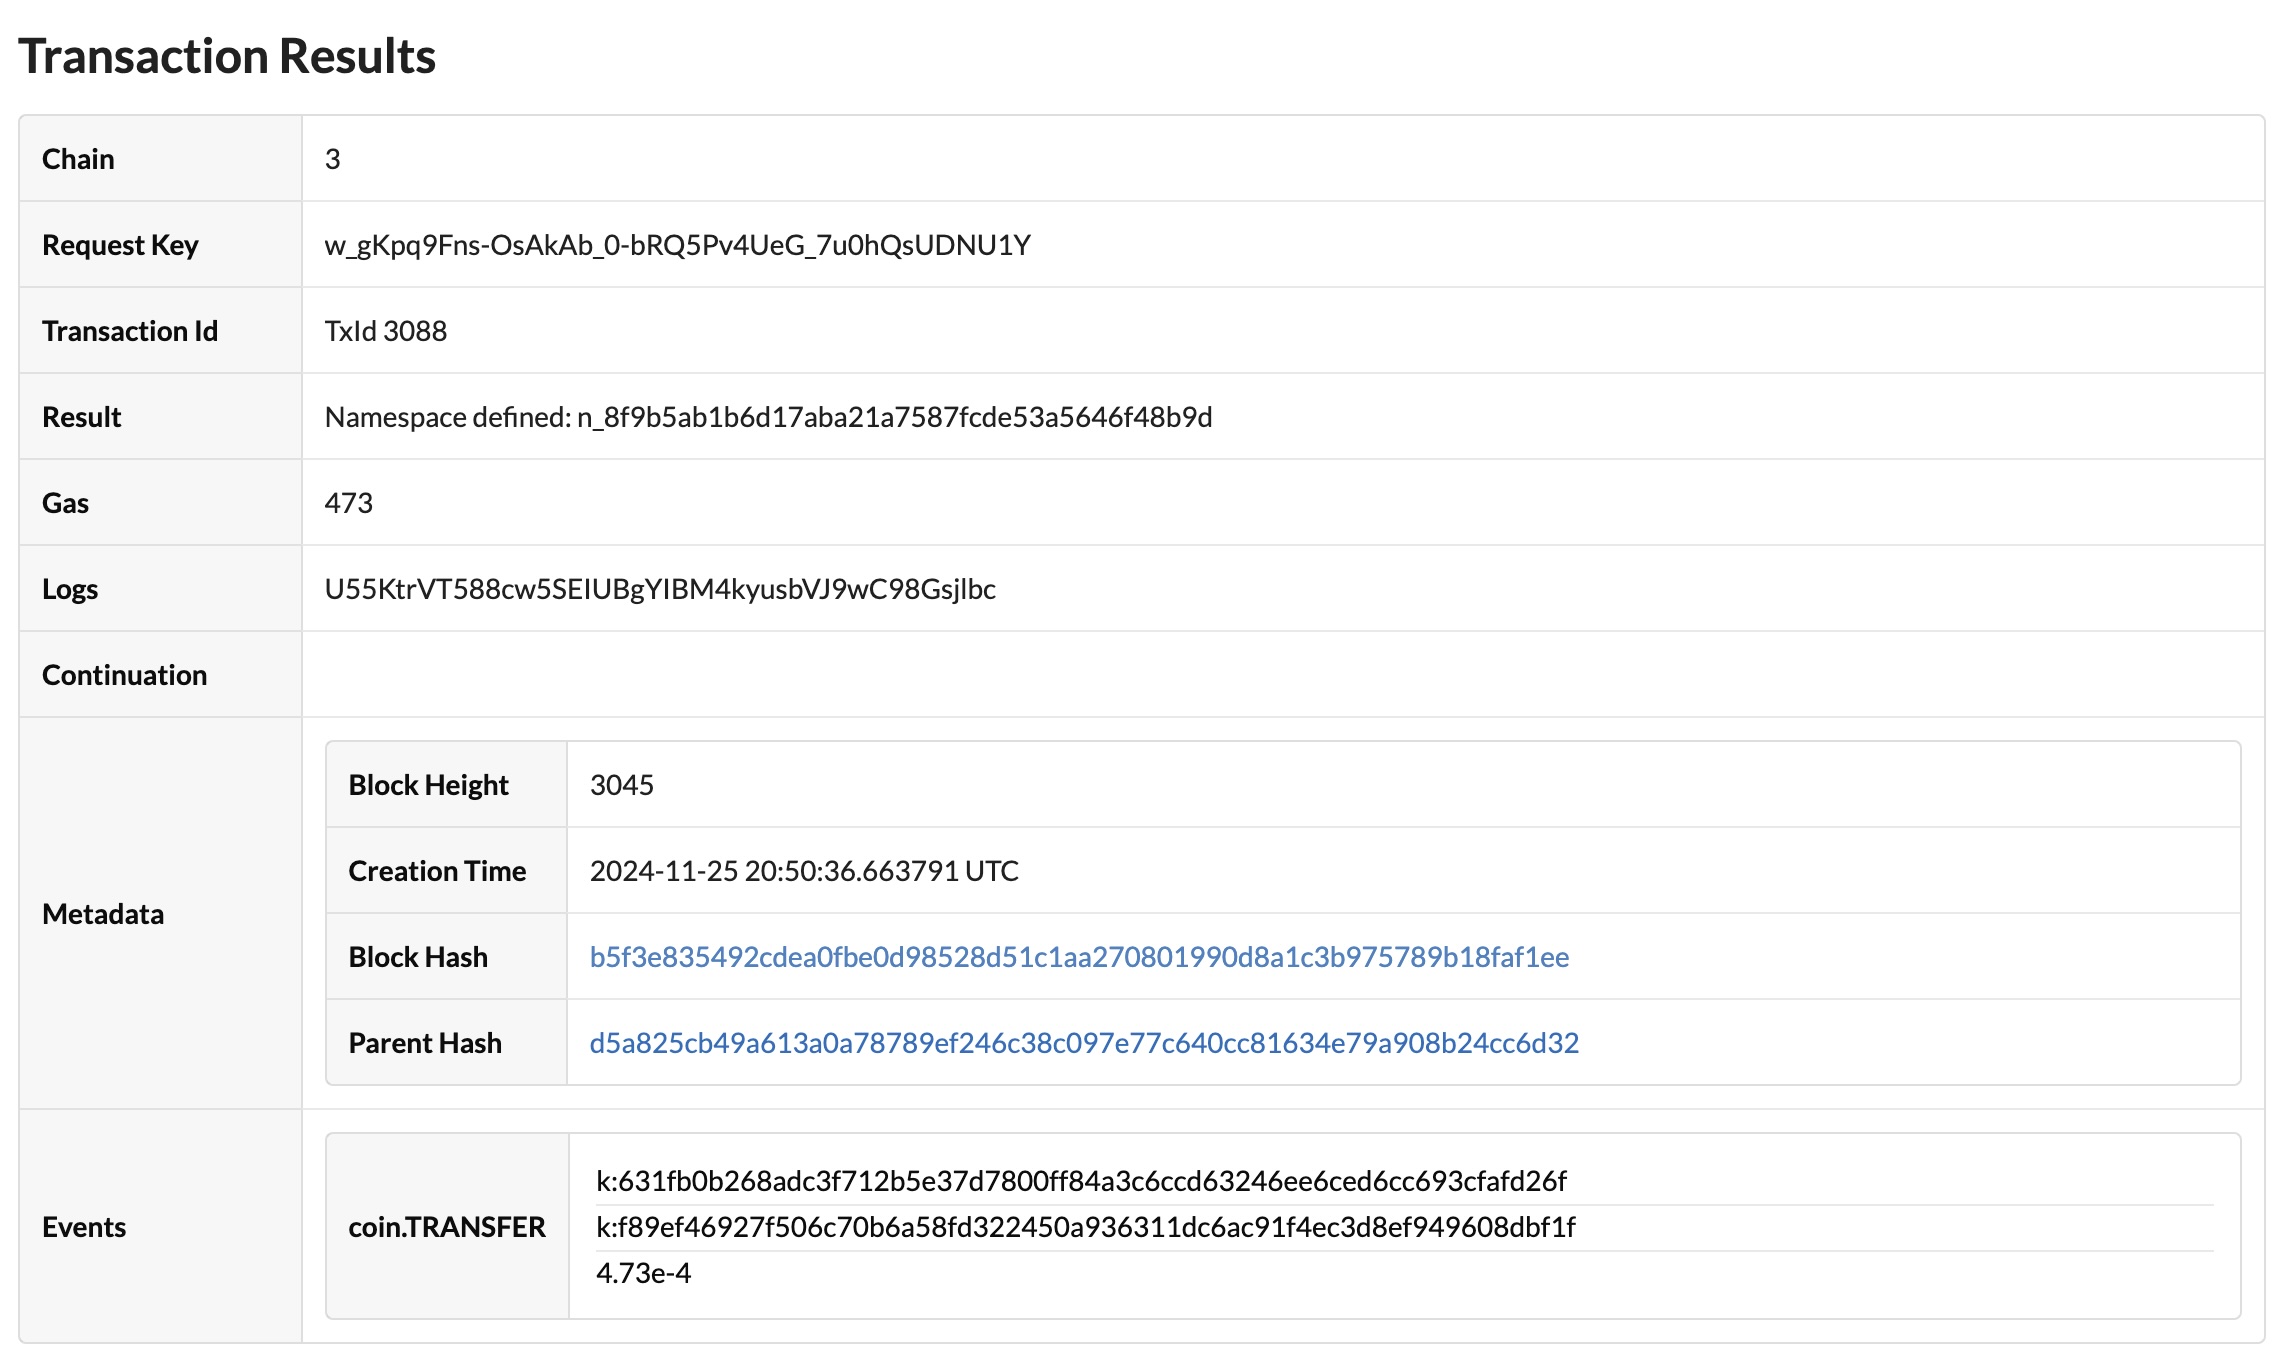
After you've defined a principal namespace on a specific network and chain, you can use the
namespacefunction in your modules to deploy and update the modules in that namespace.For example:
(namespace "n_99a0c477edf4100bc22b65d679e5dbe6e2da4b70")
(define-keyset "n_99a0c477edf4100bc22b65d679e5dbe6e2da4b70.owner" (read-keyset "owner"))