Add a gas station
Traditional elections have minimal safeguards against fraud, corruption, mishandling of ballots, and intentional or unintentional disruptions. Even where voting is available by mail or online, elections can be costly, inefficient, and subject to human error.
By using blockchain technology, elections could be made more convenient, transparent, and reliable. For example:
- Every vote can be recorded as a public transaction that can't be altered.
- Voters can remain anonymous with votes linked to an encrypted digital fingerprint instead of government-issued identification.
- Election results can be independently verified by anyone.
However, there is one main drawback to using a blockchain to cast votes in an election. Because every vote is a public transaction that changes the state of the blockchain, every vote requires computational resources and incurs a processing fee—commonly referred to as a gas payment.
Paying for transaction processing is normal in the context of many business operations, but paying to vote is essentially undemocratic. To address this issue, Kadena introduced a transaction processing clearing house for paying fees called a gas station.
A gas station is an account that exists only to make transaction fee payments on behalf of other accounts and under specific conditions. For example, a government agency could apply a fraction of its budget for a traditional election to fund a gas station. The gas station could then pay the transaction fee for every voting transaction, allowing all citizens to vote for free.
For more information about the introduction of gas stations, see The First Crypto Gas Station is Now on Kadena’s Blockchain.
Before you begin
Before you start this tutorial, verify the following basic requirements:
- You have an internet connection and a web browser installed on your local computer.
- You have a code editor, such as Visual Studio Code, access to an interactive terminal shell, and are generally familiar with using command-line programs.
- You have cloned the voting-dapp repository to create your project directory as described in Prepare your workspace.
- You have the development network running in a Docker container as described in Start a local blockchain.
- You are connected to the development network using your local host IP address and port number 8080.
- You have created and funded an administrative account as described in Add an administrator account.
- You have created a principal namespace on the development network as described in Define a namespace.
- You have defined the keyset that controls your namespace using the administrative account as described in Define keysets.
- You have created an
electionPact module and deployed it as described in Write a smart contract. - You have added functions and updated the
electionmodule deployed on the development network as described in Nominate candidates and Add vote management.
Create a voter account
In the previous tutorial, you voted with your administrative account. The transaction was successful because the account had sufficient funds to pay the transaction fee. For this tutorial, you need to create a new voter account on the development network. Initially, you'll use the voter account to see that voting in the election application requires you to have funds in an account. Later, you'll use the voter account to verify that voting transactions are paid using a separate gas station account.
As previously discussed, there are many ways you can create keys and accounts, including kadena-cli commands, Chainweaver, or another wallet application.
For this tutorial, you'll create an account in the wallet you created when you ran the kadena config init command in Create an account.
To create a voter account:
-
Verify the development network is currently running on your local computer.
-
Open a terminal shell on your computer.
-
Add a new account to the wallet by running
kadena account addand following the prompts displayed.For example:
? How would you like to add the account locally? Wallet - Add an account by providing public keys from a list of available wallets
? Select a wallet: Wallet: pistolas
? Enter an alias for an account: voter
? Enter the name of a fungible: coin
? Select public keys to add to account(index - alias - publickey): Generate new public key
? Enter the wallet password: ********
? Select a keyset predicate: keys-all

The account configuration "voter" has been saved in .kadena/accounts/voter.yaml
You now have a new local
voteraccount. However, the account doesn't exist on any specific network or chain. You could usekadena account fundto give the account a minimal balance on the development network. For the purposes of this tutorial, you want to add the account to the coin ledger with a zero (0.0) balance. To do that, you can create a transaction that calls thecoin.create-accountfunction. -
Add a new
create-account.ktpltransaction template for creating an account in the.kadena/transaction-templatesfolder. For example:code: |-
(coin.create-account "{{{new-account-name}}}" (read-keyset "account-guard"))
data:
account-guard:
keys:
- {{{publicKey}}}
pred: {{{predicate}}}
meta:
chainId: "{{chain-id}}"
sender: {{{wallet-account}}}
gasLimit: 2000
gasPrice: 0.00000001
ttl: 7200
signers:
- public: {{wallet-publicKey}}
caps:
- name: "coin.GAS"
args: []
networkId: "{{network:networkId}}"
type: exec -
Create a transaction that uses the template by running the
kadena tx addcommand and following the prompts displayed.For this transaction:
- Use the
voteraccount name from your wallet for thenew-account-namevariable. - Use the
voterpublic key for thepublicKeyvariable. - Use the
walletaccount name for thewallet-accountvariable. - Use the
walletpublic key for thewallet-publicKeyvariable.
- Use the
-
Sign the transaction by running the
kadena tx signcommand and following the prompts displayed.For this transaction, select the
Sign with walletoption and specify the wallet password. -
Send the signed transaction to the blockchain by running the
kadena tx sendcommand and following the prompts displayed.
Attempt to cast a vote
To attempt to cast a vote with the new voter account:
-
Verify the development network is currently running on your local computer.
-
Add a new
vote.ktpltransaction template in the.kadena/transaction-templatesfolder. For example:code: |-
(n_90785a0e8c65525ef342c84991842f851868f7cb.election.vote "{{account-name}}")
data:
meta:
chainId: "{{chain-id}}"
sender: "{{{account-name}}}"
gasLimit: 80300
gasPrice: 0.000001
ttl: 600
signers:
- public: "{{public-key}}"
caps: []
networkId: "{{network-id}}" -
Create a transaction that uses the template by running the
kadena tx addcommand and following the prompts displayed.For this transaction:
- Use the voter account name from your wallet for the
account-namevariable. - Use the chain where you deployed the election module for the
chain-idvariable. - Use the voter public key for the
publicKeyvariable. - Use development for the
network-idvariable.
- Use the voter account name from your wallet for the
-
Sign the transaction by running the
kadena tx signcommand, select theSign with walletoption, and type the wallet password. -
Send the signed transaction by running the
kadena tx sendcommand and selecting the signed transaction file.Because the current implementation doesn't allow accounts with a zero balance to vote, you'll see that the transaction fails with an error message similar to the following:
Error in processing transaction: "D62Gs0Zx...3f8vuajw" Failed to buy gas: Insufficient funds
Implement the gas payer interface
Before accounts without funds can vote, you need to add a second Pact module—the election-gas-station module—that implements the gas-payer interface to your election smart contract.
To create the gas station module:
-
Open the
election-workshop/pactfolder in the code editor on your computer. -
Create a new
election-gas-station.pactfile in thepactfolder. -
Open the
election-gas-station.pactfile and add the Pact code to specify the namespace, module name, and module owner.For example:
(namespace "n_d5ff15d933b83c1ef691dce3dabacfdfeaeade80")

(module election-gas-station GOVERNANCE
  (defcap GOVERNANCE ()
    (enforce-guard (keyset-ref-guard "n_d5ff15d933b83c1ef691dce3dabacfdfeaeade80.election-admin")))

)
As you can see in this example, the new module—like the
electionmodule—is deployed in the principal namespace and governed by theelection-adminkeyset. Be sure you replace the namespace and keyset information with the principal namespace and keyset you have deployed on the development network. -
Add
gas-payer-v1as the interface you want to implement in this module inside of the module declaration.For example:
(namespace "n_d5ff15d933b83c1ef691dce3dabacfdfeaeade80")

(module election-gas-station GOVERNANCE
  (defcap GOVERNANCE ()
    (enforce-guard (keyset-ref-guard "n_d5ff15d933b83c1ef691dce3dabacfdfeaeade80.election-admin")))
  (implements gas-payer-v1)
)
You can find the
gas-payer-v1interface locally in theelection-workshop/pact/root/gas-payer-v1.pactfile for your project so that you can test your module in the Pact REPL. The interface is also pre-installed on the Kadena development, test, and main networks, so you don't need to deploy it when you deploy theelection-gas-stationmodule. However, you must implement the capabilities, types, and functions that are defined in thegas-payer-v1.pactfile before you can start testing. -
Implement the
GAS_PAYERcapability as defined in thegas-payer-v1.pactfile and compose an inner capability calledALLOW_GASto use as a guard for the account used to pay transaction fees:(defcap GAS_PAYER:bool
( user : string
limit : integer
price : decimal
)
(compose-capability (ALLOW_GAS))
)
(defcap ALLOW_GAS () true)
(defun create-gas-payer-guard:guard ()
(create-capability-guard (ALLOW_GAS))
)With this code, an account granted the
GAS_PAYERcapability can pay gas fees for any transaction. In addition, thecreate-gas-payer-guardfunction uses the built-increate-capability-guardfunction to return a guard for theALLOW_GAScapability. The guarded inner capabilityALLOW_GASalways returnstrueso that the gas station account can pay the transaction fees on behalf of any account. -
Create a
election-gas-station.replfile in thepactfolder and add the following lines of code:(load "setup.repl")
(begin-tx "Load election gas station module")
(load "root/gas-payer-v1.pact")
(load "election-gas-station.pact")
(commit-tx) -
Execute the code in the
election-gas-station.replfile using the Pact command-line interpreter and the--tracecommand-line option.pact election-gas-station.repl --traceYou should see that the transaction succeeds with output similar to the following:
...
election-gas-station.repl:3:2-3:33:Trace: "Loading root/gas-payer-v1.pact..."
root/gas-payer-v1.pact:0:0-31:1:Trace: Loaded interface gas-payer-v1, hash iIWAP1oen_kpXjFbnQM87AJRZIgtsfZcAwYrEy21RWQ
election-gas-station.repl:4:2-4:36:Trace: "Loading election-gas-station.pact..."
election-gas-station.pact:1:0-1:56:Trace: "Namespace set to n_d5ff15d933b83c1ef691dce3dabacfdfeaeade80"
election-gas-station.pact:3:0-22:1:Trace: Loaded module n_d5ff15d933b83c1ef691dce3dabacfdfeaeade80.election-gas-station, hash vYfspyHz004xJXyR224XLZsktOtPI5qEN5VcW7pZsdM
election-gas-station.repl:5:0-5:11:Trace: "Commit Tx 3 Load election gas station module"
Load successful
Now that you have a working implementation of the
gas-payer-v1interface, you can deploy the new module on the development network to test whether it can pay the transaction fee for votes cast using the election application.
Deploy the module on the development network
To deploy the new Pact module on the development network:
-
Verify the development network is currently running on your local computer.
-
Copy the
election-module-devnet.ktpltransaction template that you created previously and rename the file aselection-gas-module-devnet.ktplto add create new transaction template. -
Remove the
"init-candidates": trueand"upgrade": trueproperties, then save the file. -
Create a transaction that uses the
election-gas-module-devnet.ktpltemplate by running thekadena tx addcommand and following the prompts displayed. -
Sign the transaction by running the
kadena tx signcommand and following the prompts displayed. -
Send the signed transaction to the blockchain by running the
kadena tx sendcommand and following the prompts displayed.You can verify the transaction results using the request key for the transaction.

Create the gas station account
Because the GAS_PAYER account is guarded by the ALLOW_GAS capability, you can use the create-principal built-in function to automatically create its account name with a c: prefix.
You can then define the gas station account name as a constant in the election-gas-station.pact file.
To create a capability-guarded account:
-
Open the
election-workshop/pactfolder in the code editor on your computer. -
Open the
election-gas-station.pactfile and add the following line of code to the end of the module declaration:(defconst GAS_STATION_ACCOUNT (create-principal (create-gas-payer-guard))) -
Open the
./pact/election-gas-station.replfile and update the transaction to display the capability-guarded gas station account name when you run the file.(load "setup.repl")
(begin-tx "Load election gas station module")
(load "root/gas-payer-v1.pact")
(load "election-gas-station.pact")
[GAS_STATION_ACCOUNT]
(commit-tx) -
Execute the code in the
election-gas-station.replfile using the Pact command-line interpreter and the--tracecommand-line option.pact election-gas-station.repl --traceYou should see that the transaction succeeds with output similar to the following:
...
election-gas-station.repl:4:2-4:36:Trace: "Loading election-gas-station.pact..."
election-gas-station.pact:1:0-1:56:Trace: "Namespace set to n_d5ff15d933b83c1ef691dce3dabacfdfeaeade80"
election-gas-station.pact:3:0-24:1:Trace: Loaded module n_d5ff15d933b83c1ef691dce3dabacfdfeaeade80.election-gas-station, hash QZMPB9N5frFc_gcJ3o7YtqTqCvMKhLA4OUxVT9X8sPU
election-gas-station.repl:5:2-5:23:Trace: ["c:1PaIauckhwRAVXP8YyoxSIczy60Nh9s9-_K59ugzW8A"]
election-gas-station.repl:6:0-6:11:Trace: "Commit Tx 3 Load election gas station module"
Load successful -
Open the
election-gas-station.pactfile in the code editor on your computer. -
Add an
initfunction that uses thecreate-accountfunction from thecoinmodule to create the gas station account in theelection-gas-stationmodule:(defun init ()
(coin.create-account GAS_STATION_ACCOUNT (create-gas-payer-guard))
)In this code:
- The first argument of the function is the account name you just defined.
- The second argument is the guard for the account.
-
Add an if-statement after the module declaration that calls the
initfunction if the module is deployed with{ "init": true }in the transaction data:(if (read-msg 'init)
[(init)]
["not creating the gas station account"]
) -
Update the
election-gas-station.replfile to setinitto true for the next transaction by adding the following lines of code after loading thesetup.replmodule:(env-data
{ "init": true }
) -
Execute the code in the
election-gas-station.replfile using the Pact command-line interpreter and the--tracecommand-line option.pact election-gas-station.repl --traceYou should see that the transaction succeeds with output similar to the following:
...
election-gas-station.pact:29:0-32:1:Trace: ["Write succeeded"]
election-gas-station.repl:9:2-9:23:Trace: ["c:1PaIauckhwRAVXP8YyoxSIczy60Nh9s9-_K59ugzW8A"]
election-gas-station.repl:10:0-10:11:Trace: "Commit Tx 3 Load election gas station module"
Load successful
If you're successful loading the
election-gas-station modulein the Pact REPL, you can update the module deployed on the development network.
Update the gas station module
To deploy the new Pact module on the development network:
-
Verify the development network is currently running on your local computer.
-
Open the
election-gas-module-devnet.ktplfile, add the"init": trueproperty to the transaction data, and save the file.data:
election-admin:
keys: ["{{public-key}}"]
pred: "keys-all"
"init": true -
Create a transaction that uses the
election-gas-module-devnet.ktpltemplate by running thekadena tx addcommand and following the prompts displayed. -
Sign the transaction by running the
kadena tx signcommand and following the prompts displayed. -
Send the signed transaction to the blockchain by running the
kadena tx sendcommand and following the prompts displayed.You can verify the transaction results using the request key for the transaction.
Fund the gas station account
Now that you have created and deployed a secure gas station account, you're ready to fund the account to pay transaction fees.
To fund the gas station account:
-
Verify the development network is currently running on your local computer.
-
Create a transaction that uses the
transfer.ktpltemplate by running thekadena tx addcommand and following the prompts displayed.For this transaction:
- Use the election administrator account for the
account:fromvariable. - Use the capability-guarded account (c:) for the
account:tovariable. - Use 1.0 for the
decimal:amountvariable. - Use the chain identifier where you deployed the election module for the
chain-idvariable. - Use the public key for election administrator for the
key:fromtvariable. - Use development for the
network-idvariable.
- Use the election administrator account for the
-
Sign the transaction by running the
kadena tx signcommand and following the prompts displayed. -
Send the signed transaction to the blockchain by running the
kadena tx sendcommand and following the prompts displayed.
Update the vote function
The next step is to ensure that the signature of the voter account is within the scope of the GAS_PAYER capability.
To do this, you'll update the vote function to accept the following arguments:
- The voter account name.
- Zero as the gas limit to allow unlimited gas.
- Zero as the gas price.
You'll also change the senderAccount in the transaction metadata to use the election-gas-station module so that the election gas station account pays the transaction fee for voting transactions instead of the voter account.
To update the vote function:
-
Open the
frontend/src/repositories/vote/DevnetVoteRepository.tsfile in the code editor. -
Update the
votefunction to change the.addSigner(accountKey(account))code as follows:.addSigner(accountKey(account), (withCapability) => [
withCapability(`${NAMESPACE}.election-gas-station.GAS_PAYER`, account, { int: 0 }, { decimal: '0.0' }),
]) -
Update the
senderAccountin the transaction metadata to use the capability-guarded gas station account.For example as follows:
.setMeta({
   chainId: CHAIN_ID,
   ttl: 28000,
   gasLimit: 100000,
   gasPrice: 0.000001,
   senderAccount: 'c:6mPDcWM1oMKDI3mdEio-Yczjul4IYZYcjlhZ--Rkhe8',
})
Set the scope for signatures
At this point, most of the work required to use a gas station to pay transaction fees is done.
However, when you added the ACCOUNT-OWNER capability to the election-workshop/pact/election.pact file in the previous tutorial, you didn't set the scope for the capability.
In a test from the previous tutorial, the caps field passed to env-sigs is an empty array:
(env-sigs
  [{ 'key  : "voter"
   , 'caps : []
  }]
)
Because the signature isn't scoped to any capability, the unrestricted signing key automatically approves all capabilities required for the function to execute.
However, in this tutorial, you modified the vote function in the frontend/src/repositories/vote/DevnetVoteRepository.ts file to scope the signature of the vote transaction to grant the GAS_PAYER capability, but not the ACCOUNT-OWNER capability.
If you sign for some capabilities but not for all capabilities that are required for a transaction, the transaction will fail at the point where a capability is required that you didn't sign for.
Therefore, you need to add a second capability to the array passed to addSigners in the vote function.
To set the scope for the ACCOUNT-OWNER capability:
-
Open the
frontend/src/repositories/vote/DevnetVoteRepository.tsfile in the code editor. -
Add the
ACCOUNT-OWNERcapability to the.addSignerwith the following line of code:withCapability(`${NAMESPACE}.election.ACCOUNT-OWNER`, account),After making this change, the voter signature is scoped to two capabilities:
.addSigner(accountKey(account), (withCapability) => [
   withCapability(`${NAMESPACE}.election-gas-station.GAS_PAYER`, account, { int: 0 }, { decimal: '0.0' }),
   withCapability(`${NAMESPACE}.election.ACCOUNT-OWNER`, account),
 ])
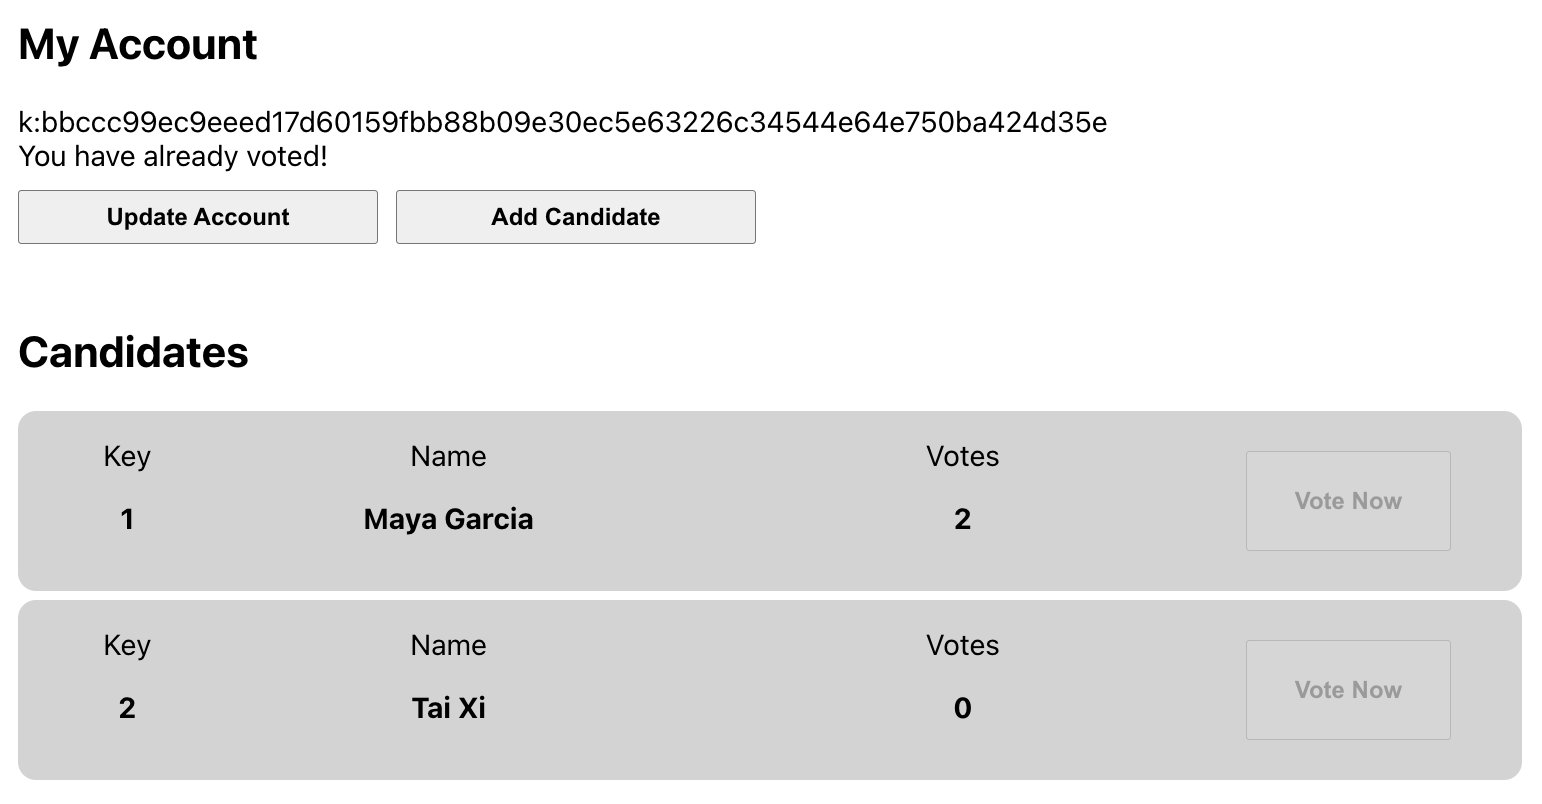
Cast a vote
To cast a vote with the voter account:
-
Verify the development network is currently running on your local computer.
-
Open
http://localhost:5173in your browser and verify that there's at least one candidate listed. -
Click Set Account, copy and paste the voter account name from Chainweaver to vote using that account, then click Save.
-
Click Vote Now for a candidate, sign the transaction, and wait for it to complete.
You should see the vote count for the candidate you voted for incremented by one vote.
Enforce a limit on transaction fees
You now have a functioning gas station for the election application. However, you might want to make some additional changes to make the module more secure. For example, you should enforce an upper limit for transaction fees to help ensure that funds in the gas station account aren't drained too quickly.
To set an upper limit for transaction fees:
-
Open the
election-gas-station.pactfile in the code editor on your computer. -
Add the following function to retrieve the gas price from the metadata of the transaction using the built-in
chain-datafunction:(defun chain-gas-price ()
(at 'gas-price (chain-data))
) -
Add the following function to force the gas price to be below a specified limit.
(defun enforce-below-or-at-gas-price:bool (gasPrice:decimal)
  (enforce (<= (chain-gas-price) gasPrice)
    (format "Gas Price must be lower than or equal to {}" [gasPrice]))
) -
Update the
GAS_PAYERcapability by adding(enforce-below-or-at-gas-price 0.000001)right before(compose-capability (ALLOW_GAS)).For example:
(enforce-below-or-at-gas-price 0.000001)
(compose-capability (ALLOW_GAS))
Set limits on the transactions allowed
In its current state, any module can use your gas station to pay for any type of transaction, including transactions that involve multiple steps and could be quite costly. For example, a cross-chain transfer is a transaction that requires a continuation with part of the transaction taking place on the source chain and completed on the destination chain. This type of "continued" transaction requires more computational resources—that is, more gas—than a simple transaction that completes in a single step.
To prevent the gas station account from being depleted by transactions that require multiple steps, you can configure the gas station module to only allow simple transactions, identified by the exec transaction type. Transactions identified with the exec transaction type can contain multiple functions but complete in a single step.
To set limits on the transactions allowed to access the gas station account:
-
Open the
election-gas-station.pactfile in the code editor on your computer. -
Restrict the transaction type to only allow
exectransactions by adding the following line to the start of theGAS_PAYERcapability definition:(enforce (= "exec" (at "tx-type" (read-msg))) "Can only be used inside an exec")An
exectransaction can contain multiple function calls. You can further restrict access to the funds in the gas station account by only allowing specific function calls.An
exectransaction can contain multiple function calls. You can also restrict access to the gas station account by only allowing specific function calls. -
Restrict access to only allow one function call by adding the following line to the
GAS_PAYERcapability definition:(enforce (= 1 (length (at "exec-code" (read-msg)))) "Can only be used to call one pact function") -
Restrict access to only pay transaction fees for functions defined in the
electionmodule by adding the following line to theGAS_PAYERcapability definition:(enforce
(= "(n_14912521e87a6d387157d526b281bde8422371d1.election." (take 52 (at 0 (at "exec-code" (read-msg)))))
"Only election module calls are allowed"
)Remember to replace the namespace with your own principal namespace.
Update the smart contract on the development network
After you've completed the changes to secure the gas station account, you are ready to update the smart contract you have deployed on the development network and complete the workshop.
To update the smart contract and complete the workshop:
-
Open the
election-workshop/pactfolder in a terminal shell on your computer and verify all of the tests you created in the workshop pass using the Pact REPL.- pact/candidates.repl
- pact/election-gas-station.repl
- pact/keyset.repl
- pact/module.repl
- pact/namespace.repl
- pact/principal-namespace.repl
- pact/setup.repl
-
Verify the development network is currently running on your local computer.
-
Open and unlock the Chainweaver desktop or web application and verify that:
- You're connected to development network (devnet) from the network list.
- Your administrative account name with the k: prefix exists on chain 1.
- Your administrative account name is funded with KDA on chain 1.
-
Open the
election-workshop/snippetsfolder in a terminal shell on your computer. -
Update your
election-gas-stationmodule on the development network by running a command similar to the following with your administrative account name:npm run deploy-gas-station:devnet -- k:<your-public-key> upgradeRemember that
k:<your-public-key>is the default account name for the administrative account that you funded in Add an administrator account. You can copy this account name from Chainweaver when viewing the account watch list. When you run the script, you should see Chainweaver display a QuickSign Request. -
Click Sign All to sign the request.
After you click Sign All, the transaction is executed and the results are displayed in your terminal shell.
-
Verify your contract changes in the Chainweaver Module Explorer by refreshing the list of Deployed Contracts, then clicking View for the
election-gas-stationmodule.After you click View, you should see the updated list of functions and capabilities. If you click Open, you can view the module code in the editor pane and verify that the
election-gas-stationmodule deployed on the local development network is what you expect.
Next steps
In this tutorial, you learned how to:
- Add a second module to your smart contract.
- Define a gas station account that pays transaction fees on behalf of other accounts.
- Restrict access to the gas station account based on conditions you specify in the Pact module.
- Deploy the gas station module on the development network.
In this workshop, you configured an election application to use the Kadena client to interact with a smart contract deployed on the Kadena blockchain as its backend. The workshop demonstrates the basic functionality for conducting an election online that uses a blockchain to provide more efficient, transparent, and tamper-proof results. However, as you saw in Add vote management, it's possible for individuals to vote more than once by simply creating additional Kadena accounts. That might be a challenge you want to explore.
As an alternative, you might want to deploy the election application and smart contract on the Kadena test network, making it available to community members.
We can't wait to see what you build next.
To see the code for the activity you completed in this tutorial, check out the 00-complete branch from the voting-dapp repository by running the following command in your terminal shell:
git checkout 00-complete